You can add/edit/delete groups to be used privately.
The group can be used in the following applications.
| All the Reservations |
Circulation/Report |
Whereabouts |
| Information |
Facility Reservation |
Document |
| User List |
|
|
|
1. To Create a Private Group
Step 1-1. Click "Profile" Link
Click "Profile" link on the portal.
|

|
Step 1-2. Click  . .
 Click this tab. Click this tab.
|

|
Step 1-3. Click .
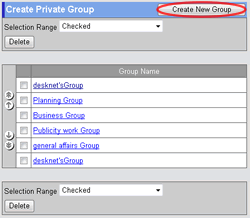
Click [Create New Group] in the Create Private Groups screen.
|
|
Step 1-4. Enter Private Group Name
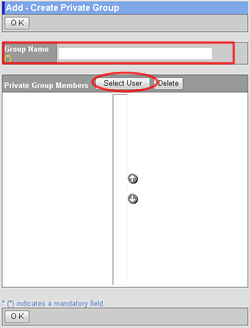
Enter private group name in [Group Name].
Step 1-5. Select Users in the Group
Select users from [Select User] and add them to [Private Group Members].
Step 1-6. Click .
Click this button to create the group. The group will be displayed in the group list.
|
 |
2. To Edit a Private Group
Step 2-1. Click "Profile" Link
The same as the step 1-1.
Step 2-2. Click  . .
The same as Step 1-2.
Step 2-3. Click "Group Name" Link
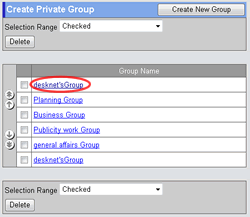
Click "Group Name" link in Create Private Groups screen.
Step 2-4. Enter Private Group Name
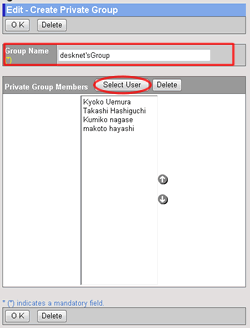
Enter private group name in [Group Name].
Step 2-5. Select Users in the Group
Select users from [Select User] and add them to [Private Group Members].
Step 2-6. Click .
Click this button to create the group. The group will be displayed in the group list.
* Click [Delete] button to delete the group.
|
 |
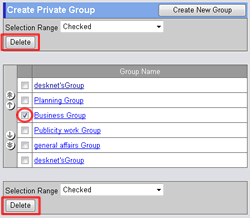
3. To Delete Private Groups
Step 3-1. Click "Profile" Link
The same as the step 1-1.
Step 3-2. Click  . .
The same as Step 1-2.
Step 3-3. Select Groups You Want to Delete
Select groups you want to delete in the [Selection Range].
Step 3-4. Click .
When you click this button a confirmation message will be displayed.
Step 3-5. Click .
Click this button to complete the deletion. |
|