To Display Address Book
Folders contacts are classified and contacts in each folder are displayed.
There are two types of address books: Public Address Book and Personal Address Book,
and has (Public), (Personal) folder respectively.
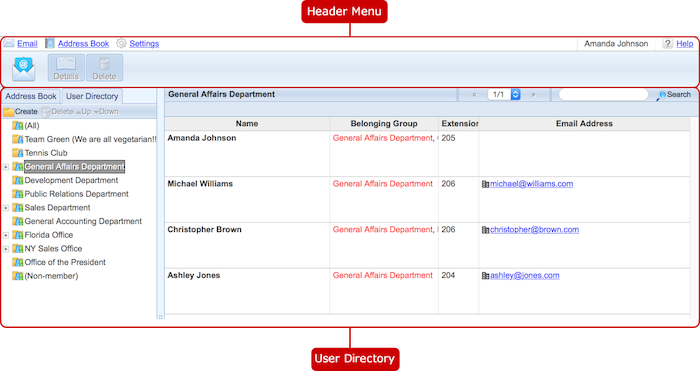
- Address Book Screen
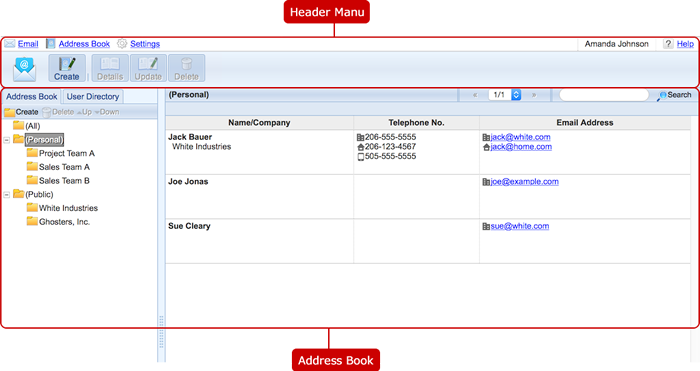 Header Menu
-
Open the main screen of WebMail.
-
Display Address Book screen.
-
Display Personal Settings screen.
-
Name of logged in user.
-
Display Help menu.
-
Open the main screen of WebMail.
-
Open the New Contact screen.
-
Open the details screen of the contact you selected.
-
The edit screen for the contact you selected is displayed.
* To edit a public contact, Edit Public Address Book by User option in General Settings has to set to "Allow".
-
Delete contacts.
Select contacts you want to delete and press this button to delete. You can select more than one setting.
* To delete a public contact, Edit Public Address Book by User option in General Settings has to set to "Allow".
Address Book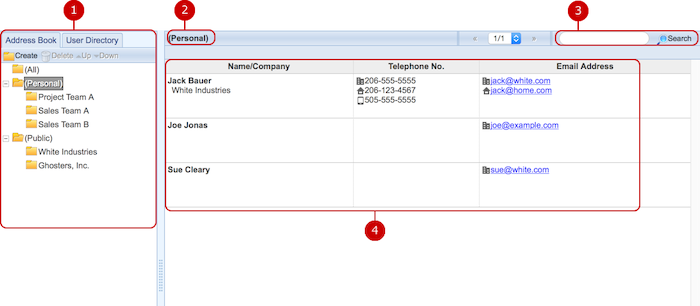
-
The list of folders is displayed.
You can move contacts to any folder. (For more details, please refer to To Manage Folders .)
-
The name of the folder selected is displayed.
-
Enter keywords to search contacts.
The search function searches in "Name", "Company", "Email", "Private Email", "Mobile Email" field by keywords.
* Both public and personal contacts are searched regardless the folder selection in the list of folders on the left.
-
The list of contacts is displayed.
You can link contacts to your mailer or WebMail.
To use this feature, setup Email Address Link option in Design Settings.
When you double click a contact, the detail of contact screen is displayed.
* In case of a public contact, a public contact that you are a sharer is displayed.
- Sub Menu
When you press the right mouse button on a folder, the sub menu is displayed.
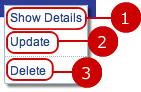
-
The detailed information about the contact you selected is displayed.
-
The edit screen for the contact you selected is displayed.
* To edit a public contact, Edit Public Address Book by User option in General Settings has to set to "Allow".
-
Delete the contacts you selected.
* To delete a public contact, Edit Public Address Book by User option in General Settings has to set to "Allow".
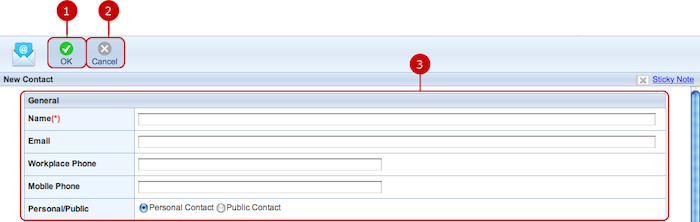
To Add Address
When you press "Create", New Contact screen is displayed.
- Contact Entry Screen (General Information)
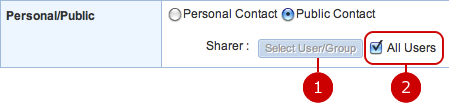
- Share Setting
When you choose Public Contact, the button to set share is displayed.
- Contact Entry Screen (Home)
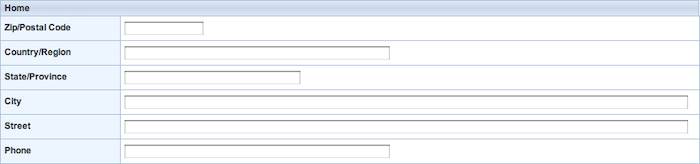
Enter information about home.
- Contact Entry Screen (Workplace)
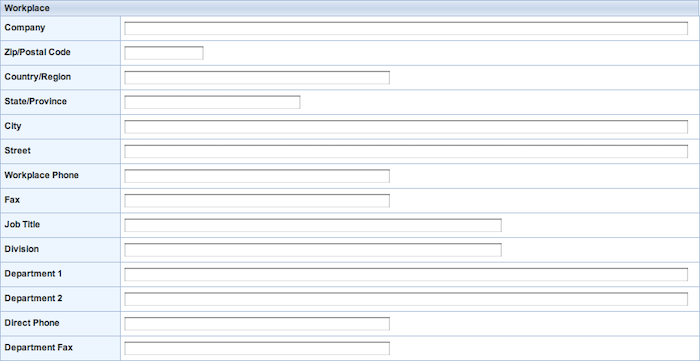
Enter information about workplace.
- Contact Entry Screen (Private)

Enter private information.
When you press Birthday field, a calendar screen is displayed. Click a date on the calendar, and it will be set to the field.
* Enter a date in MM/dd/yyyy format, numeric.
When the entry is complete, press "OK" button to save the data.
To View Contact
When you choose a contact from the list and press "Details" button, details of the contact is displayed.
You can also open details of the contact by double clicking.
- View Contact (General Information)
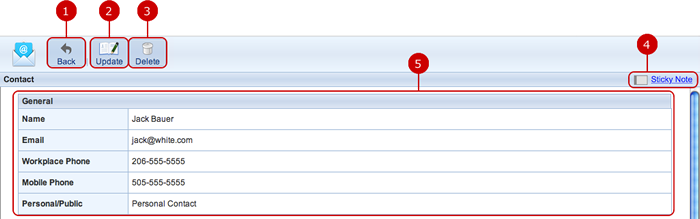
-
Back to Address Book screen.
-
The edit screen for the contact you selected is displayed.
* In case of a public contact, you have to be a sharer of the public contact.
-
Deletes the contacts you selected.
* In case of a public contact, you have to be a sharer of the public contact.
-
When you press Sticky note button, you can copy the information to a Sticky note.
Please refer to the explanation of Sticky Note for more details.
-
General information is displayed.
- Contact Details Screen (Home)
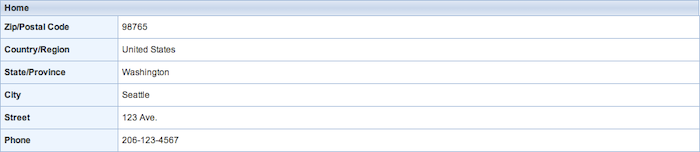
Information about home is displayed.
- Contact Details Screen (Workplace)

Information about workplace is displayed.
- Contact Details Screen (Private)
The update date is displayed for a personal contact.

The updated by is displayed for a public contact.

Private information is displayed.
To Edit Contact
When you press "Edit" button, Edit Contact screen is displayed.
* In case of a public contact, you have to be a sharer of the public contact.
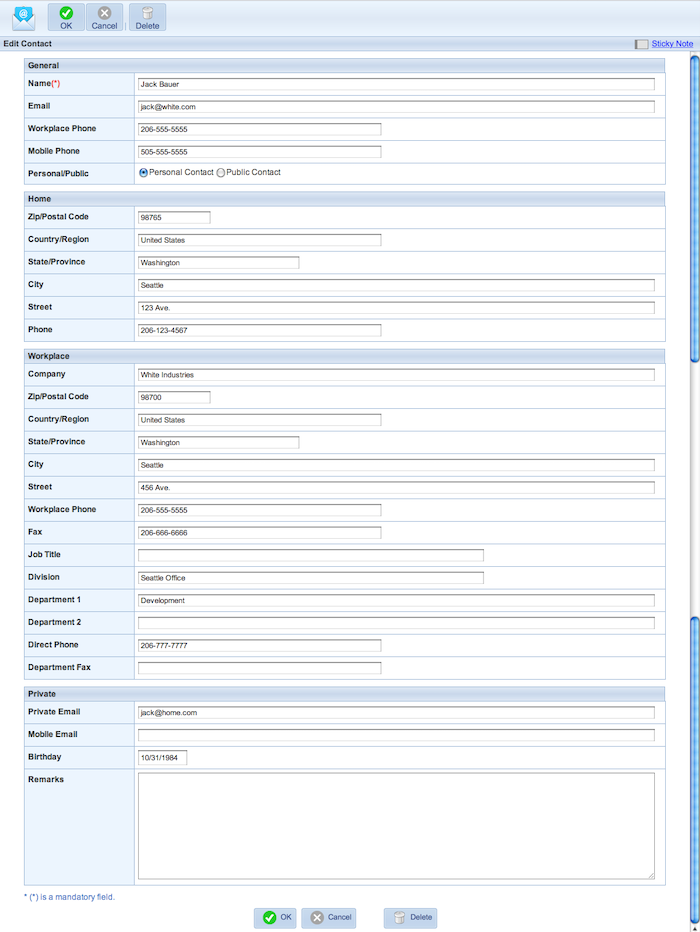
You can edit any items as you can do on New Contact screen.
When changes are complete, press "OK" button to save the data.
* You cannot change a public contact to a personal contact.
To Delete Contacts
When you press "Delete" button on the list of contacts or Edit Contact screen, a confirmation window is displayed.
When you press "Yes" button, the contacts are deleted. The contacts will be permanently deleted and cannot be recovered. Please take note.
* If editing the public address book is not allowed by the administrator, you cannot delete public contacts.
To Manage Folders
You can add, edit and delete folders in the list of folders.
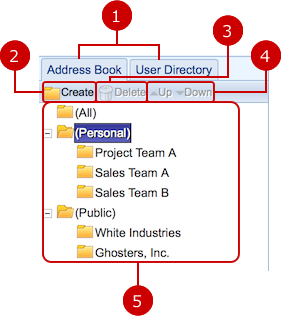
-
Switch between Address Book and User Directory.
-
Add a folder.
When you press "Create", a new window for the creation of folder is displayed.
Enter a name of the folder and choose a type of folder (personal or public).
* You can create a public folder only if the administrator gave the permission to the users.
-
Delete a folder.
When you select folders you want to delete and press "Delete" button, a delete confirmation window is displayed.
When you press "Yes" in the delete confirmation windows, the folder is deleted.
* You cannot delete (All), (Personal), and (Public) folder.
* Contacts classified in to the folder are not deleted.
* If editing the public address book is not allowed by the administrator, you cannot add public folders.
-
Move the folder you selected to upward or downward.
* If editing the public address book is not allowed by the administrator, you cannot move public folders.
-
Folders are displayed.
Folders are classified into (All), (Personal), and (Public) folder and displayed.
Folders created in (Personal) and (Public) folder are displayed.
When you choose a folder, contacts classified into the folder are displayed.
* If (All), (Personal) or (Public) is selected, you can use buttons displayed in the right of the screen to select contacts. (Please note that this function is available only if you use the Japanese user interface)
- Sub Menu
When you press the right mouse button on a folder, the sub menu is displayed.
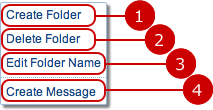
-
Create a new folder.
Enter a name of the folder and choose a type of folder (personal or public).
* You can create a public folder only if the administrator gave the permission to the users.
-
Delete a folder.
When you choose a folder you want to delete and choose "Delete Folder" from the menu, a delete confirmation window is displayed.
When you press "Yes" in the delete confirmation windows, the folder is deleted.
* You cannot delete (All), (Personal), and (Public) folder.
* Contacts classified in to the folder are not deleted.
* If editing the public address book is not allowed by the administrator, you cannot add public folders.
-
Display a windows to edit the name of the folder.
* If editing the public address book is not allowed by the administrator, you cannot edit public folders.
-
Display a message composing screen.
Email addresses of contacts in the folder are set to "To" address field and open a message composing screen.
- Classify Contacts to Folder
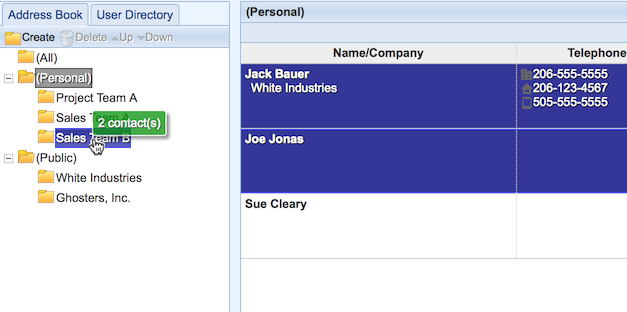
Select contacts you want to move and hold down the mouse button. When you release the mouse button over a folder, the contacts are move to the folder.
* You can select contacts by using Shift key and move them at once.
* If editing the public address book is not allowed by the administrator, you cannot move contacts to a public folder.
To Create Folders
Press "Create" button in the folders area, and Create New Contact Group window will appear.
Enter a folder name and select a folder type.

When the entry is complete, press "OK" button to save the data.
To Change Folder Names
Press the right mouse button on a folder and select "Edit Folder Name" link in the sub menu, and Edit Address Folder Name window will appear.
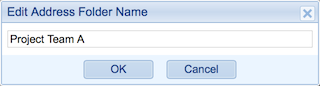
When changes are complete, press "OK" button to save the data.
To Delete Folders
Press the right mouse button on a folder and select "Delete Folder" link in the sub menu, and Confirmation window will appear.
Press "Yes" button, and the folder will be deleted. The folder will be permanently deleted and cannot be recovered. Please take note.
To Display User Directory
When you press User Directory tab, User Directory screen is displayed.
You can use users' information registered in desknet's NEO from Address Book.
 Header Menu
-
Open the main screen of WebMail.
-
Display Address Book screen.
-
Display Personal Settings screen.
-
Name of logged in user.
-
Display Help menu.
-
Open the main screen of WebMail.
-
Open the details screen of the contact you selected.
-
Remove users from a private group.
Select users from a private group and press this button to remove them from the group. You can select more than one user.
* The users are removed from the private group and never delete user information.
* You cannot remove users in the group (

) setup by the administrator.
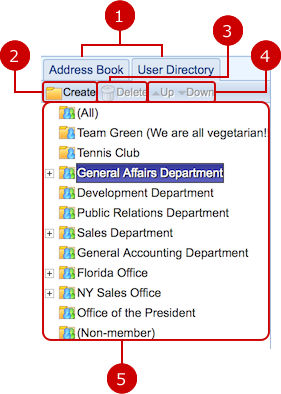
User Directory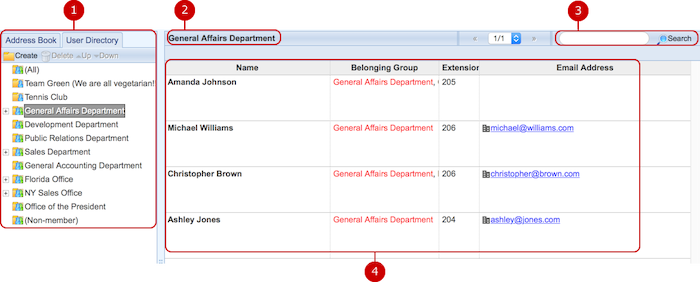
-
The list of groups and private groups is displayed.
You can move users to any folder to categorize. (Please refer to To Manage Private Groups for more details)
-
The name of the private group or group selected is displayed.
-
Enter keywords to search contacts.
The search function searches in "Name", "Nickname", "Email Address", and "Job Title" of users being displaying.
-
Users are displayed.
You can link contacts to your mailer or WebMail.
To use this feature, setup Email Address Link option in Design Settings.
When you double click a user, the user information screen is displayed.
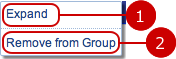
- Sub Menu
When you press the right mouse button on a folder, the sub menu is displayed.
-
Display the detailed information about the user.
-
Remove users you selected from the group.
* The users are removed from the private group and never delete user information.
* You cannot remove users in the group (
) setup by the administrator.
To View User
When you choose a user from the list and press "Details" button, details of the user is displayed.
You can also open details of the user by double clicking.

-
Back to User Directory screen.
-
User information is displayed.
To Manage Private Groups
The list of groups and private groups is displayed on the left.
You can create, edit, and delete private groups.
-
Switch between Address Book and User Directory.
-
Create a new private group.
When you press "Create", a new window for the creation of private group is displayed.
Enter a name of the private group.
-
Delete a private group.
When you choose a private group you want to delete and press "Delete" button, a delete confirmation window is displayed.
When you press "Yes" in the delete confirmation windows, the private group is deleted.
* The users in the group are not deleted.
* You cannot delete groups (
) setup by the administrator.
-
Move the private group you selected to upward or downward.
* You cannot move groups (
) setup by the administrator.
-
The list of groups is displayed.
Private groups ( ) and groups () created by the administrator are displayed.
When you choose a group, the list of users in the group is displayed.
- Sub Menu
When you press the right mouse button on a group, the sub menu is displayed.

-
Create a new private group.
Enter a name of the group.
-
Delete a private group.
When you choose a private group you want to delete and choose "Delete Private Group" from the menu, a delete confirmation window is displayed.
When you press "Yes" in the delete confirmation windows, the private group is deleted.
* The users in the group are not deleted.
* You cannot delete groups (
) setup by the administrator.
-
Display a windows to edit the name of the private group.
* You cannot edit a name of the groups (
) setup by the administrator.
-
Display a message composing screen.
Email addresses of users in the group are set to "To" address field and open a message composing screen.
- Classify Users to Folder
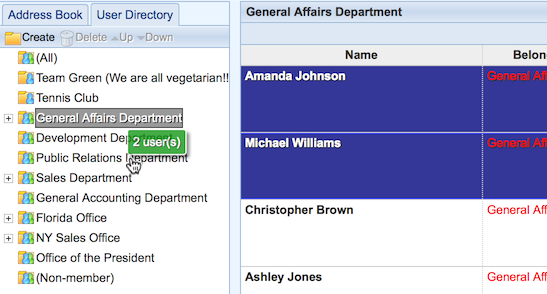
Select users you want to move and hold down the mouse button. When you release the mouse button over a group, the users are move to the group.
* You can select contacts by using Shift key and move them at once.
* You cannot move users to groups (
) setup by the administrator.
To Create Private Groups
Press "Create" button above the private group list, and Create Private Group window will appear.
Enter a new private group's name.
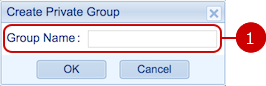
When the entry is complete, press "OK" button to save the data.
To Change Private Groups' Names
Press the right mouse button on a private group and select "Edit Private Group" link in the sub menu, and Edit Private Group window will appear.
When changes are complete, press "OK" button to save the data.
To Delete Private Groups
Press the right mouse button on a folder and select "Delete Private Group" link in the sub menu, and Confirmation window will appear.
Press "Yes" button, and the private group will be deleted. The deleted groups cannot be recovered. Please take note.
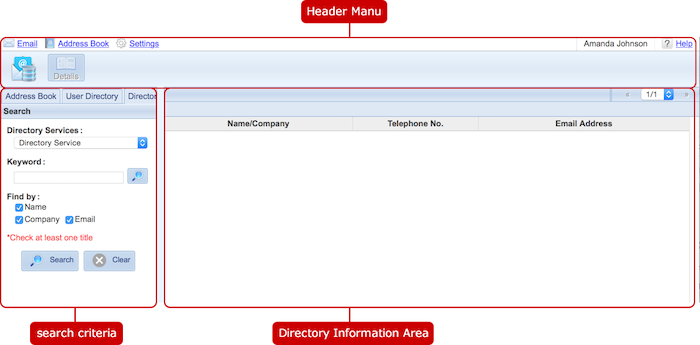
To Mine Data from Directory Services
You can search directory services which have been registered by the system administrator.
"Directory" tab is visible when at least one directory service is available.
* The "Directory" tab is only for WebMail IMAP's Address application.
* "Address Book" link on the left top of WebMain IMAP screen is also visible when at least one directory service is available.
(It ignores the settings of whether Address application and User Directory application are enabled or not.)
 Header Menu
-
Open the main screen of WebMail.
-
Display Address Book screen.
-
Display Personal Settings screen.
-
Name of logged in user.
-
Display Help menu.
-
Open the main screen of WebMail.
-
Open the details screen of the contact you selected.
Search ConditionsNo contact information is displayed in the directory tab when it is opened.
Enter search conditions and mine data you want.
Directory Information AreaNo contact information is displayed in the directory tab when it is opened.
Enter search conditions and mine data you want.
To Search Directory Services
You can search directory services with one or more keywords.

To See Data in Directory Services
To open the details screen of the searched items, select an item and press "Details" button in the header menu, or just double click the item.
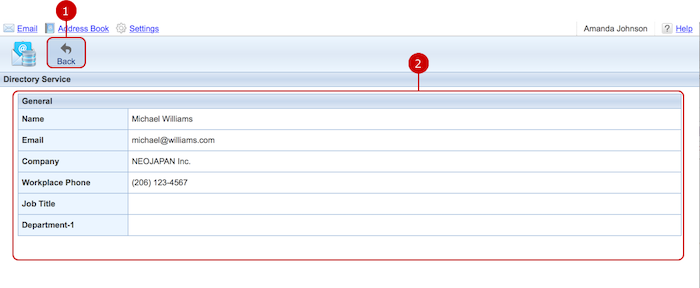
-
Go back to the list.
-
The detail information is displayed.
