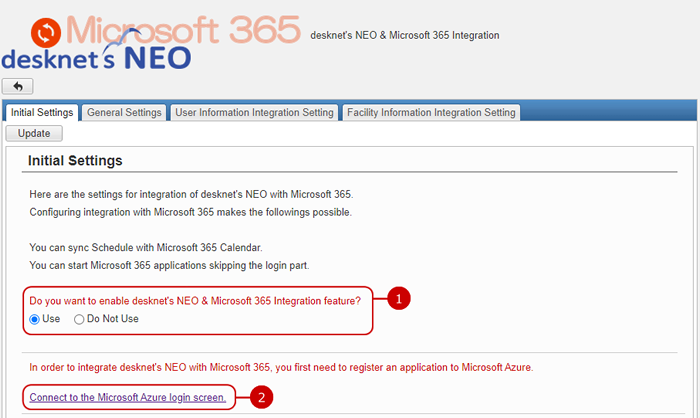
Initial Settings
This screen shows up by clicking "Microsoft 365 Integration Settings" right after the installation.
Here you can save the additional settings for Microsoft Azure and setup values for Microsoft 365 integration.
-
Define whether to enable Microsoft 365 Integration on desknet's NEO.
If yes, Schedule data and Microsoft 365 Outlook Calendar data are synchronized.
Also, you can launch Microsoft 365 applications with you automatically logged in to Microsoft 365.
-
Access Microsoft Azure and set up requirements for integration with desknet's NEO.
Click on the link to display the Microsoft Azure sign-in screen.
Please sign in with the global administrator account of Microsoft 365 and configure the required settings.
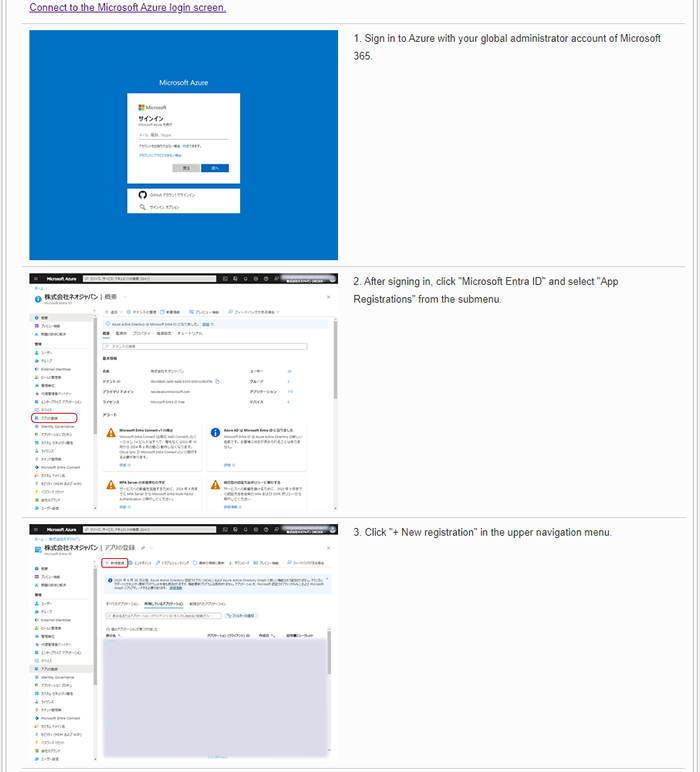
After signing in to Azure, click on "Microsoft Entra ID" and open the Microsoft Entra ID setting screen.
Then, click "+ New registration" link in "App registrations".
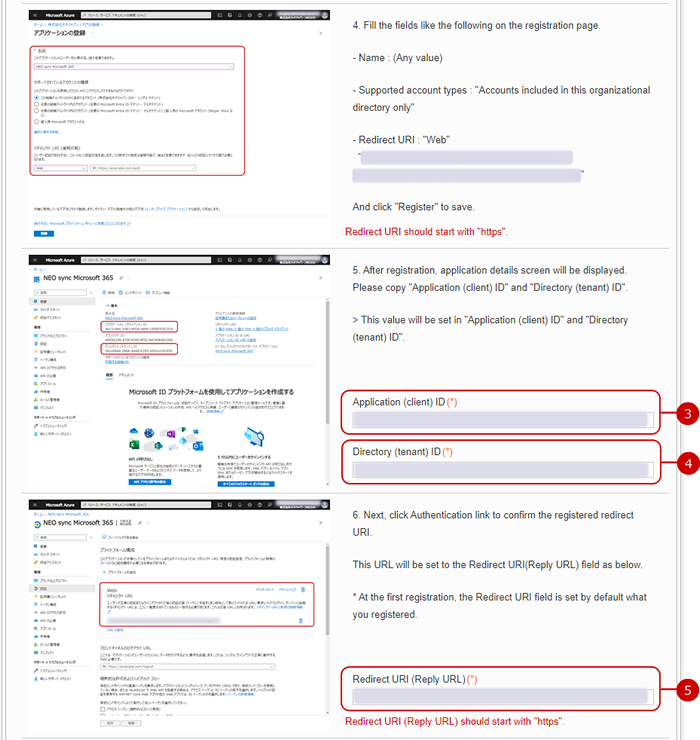
In the app registration screen, register the application using information indicated in Initial Settings screen of desknet's NEO.
For Redirect URL (optional), the URL and the module name (zo365connect.exe or zo365connect.cgi) of the currently accessed desknet's NEO are displayed.
* You can copy & paste the displayed URL on the setting screen as it is.
After the application is successfully registered, its information will be displayed, where you are required to fill the "Application (client) ID", "Directory (tenant) ID" and "Redirect URI (Reply URL)" fields.
- Application (client) ID
Used for identifying the application registered in Azure.
- Directory (tenant) ID
Used for identifying the application registered in Azure.
- Redirect URI (Reply URL)
used when accessing from Azure Copy and paste the value displayed in Authentication page, after clicking Setting icon of the registered application.
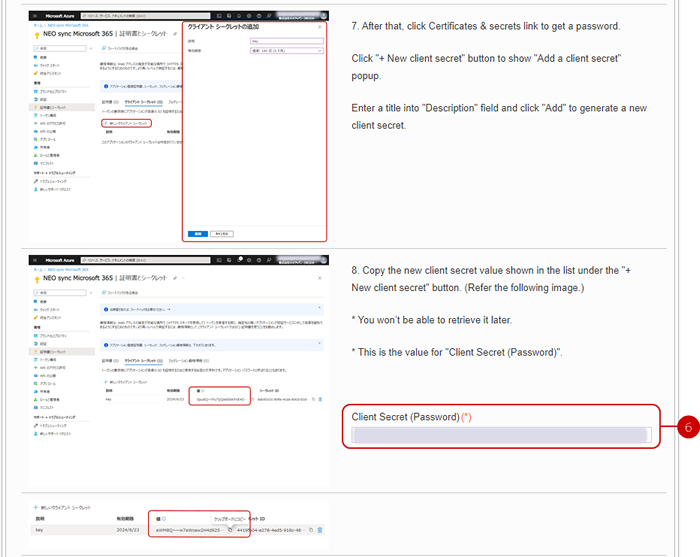
Click "Certificates & secrets" link from the application information. "Password" can be issued on the "Certificates & secrets" screen.
Enter a key description, and click "Save". (Choose a expiration date depending on your situation.)
When saved correctly, a password will be issued and displayed in the value field at the right side. Copy & paste the value to the field [Client Secret (Password)].
*Please be sure to copy the value at this point because it will not be displayed on the next screen. (If you fail to do so, you will need to issue again another password.)
- Client Secret (Password)
Please enter the password issued within "Certificates & secrets" in Azure application setting.br />
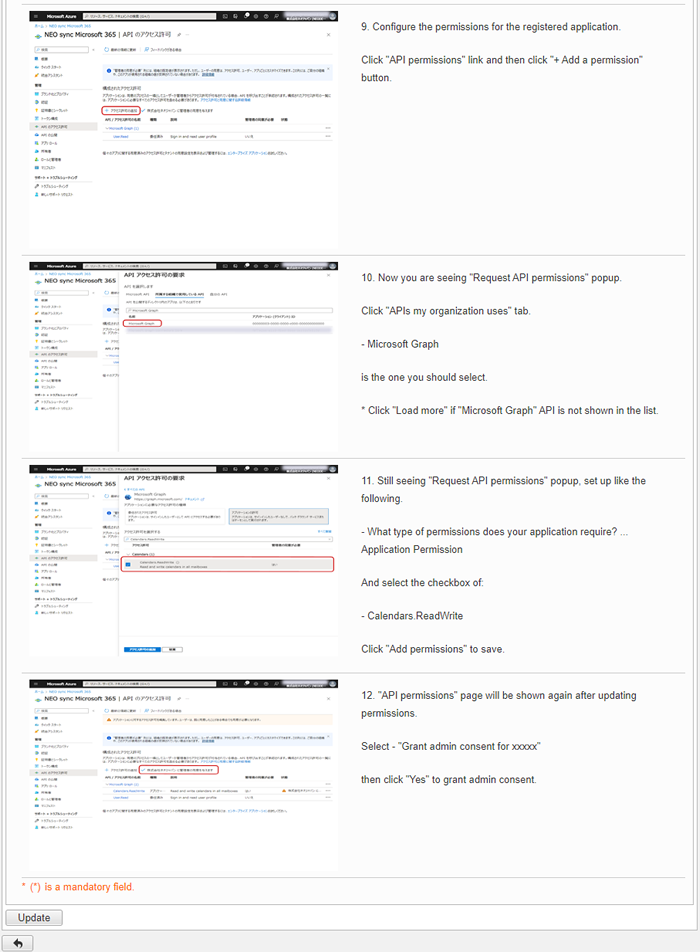
Continue with the setup of the registered application in Azure.
Open "Request API permissions" and click "Add a permission" button.
"Request API permissions" page appears then open "APIs my organization uses" tab and select "Microsoft Graph".
Next, select "Application permissions", then "Calendars.ReadWrite", and click "Add permissions" button.
"API permissions" page will be show again after updating permissions. Select "Grant admin consent for xxxxx", then click "Yes" to grant admin consent.
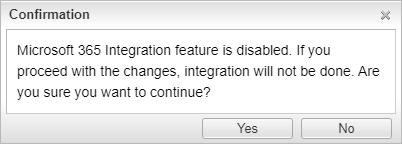
Click "Update" button to save the changes.
If "Do Not Use" is selected in "Microsoft 365 Integration" field, the following message will be displayed. Please change the value to "Use" and click "Update" again.
When "Use" is selected, [Log in with Microsoft 365] button appears on desknet's NEO login page.
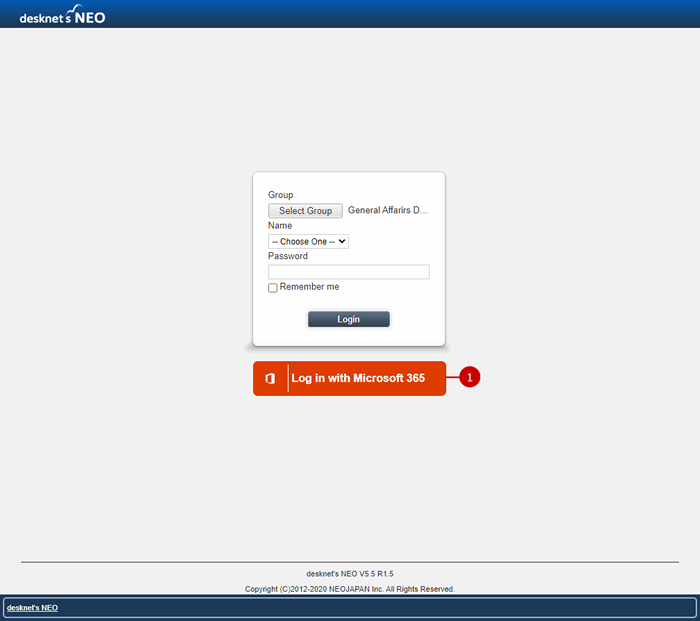
- [Log in with Microsoft 365]
Users sign in to Microsoft 365, and log in to desknet's NEO with their accounts which Microsoft 365 UPN has been configured.
Refer to [User Information Integration Setting]
Configure General Settings
Click on the General Settings tab to display common settings.
Here you can configure the common settings for using Microsoft 365 Integration.
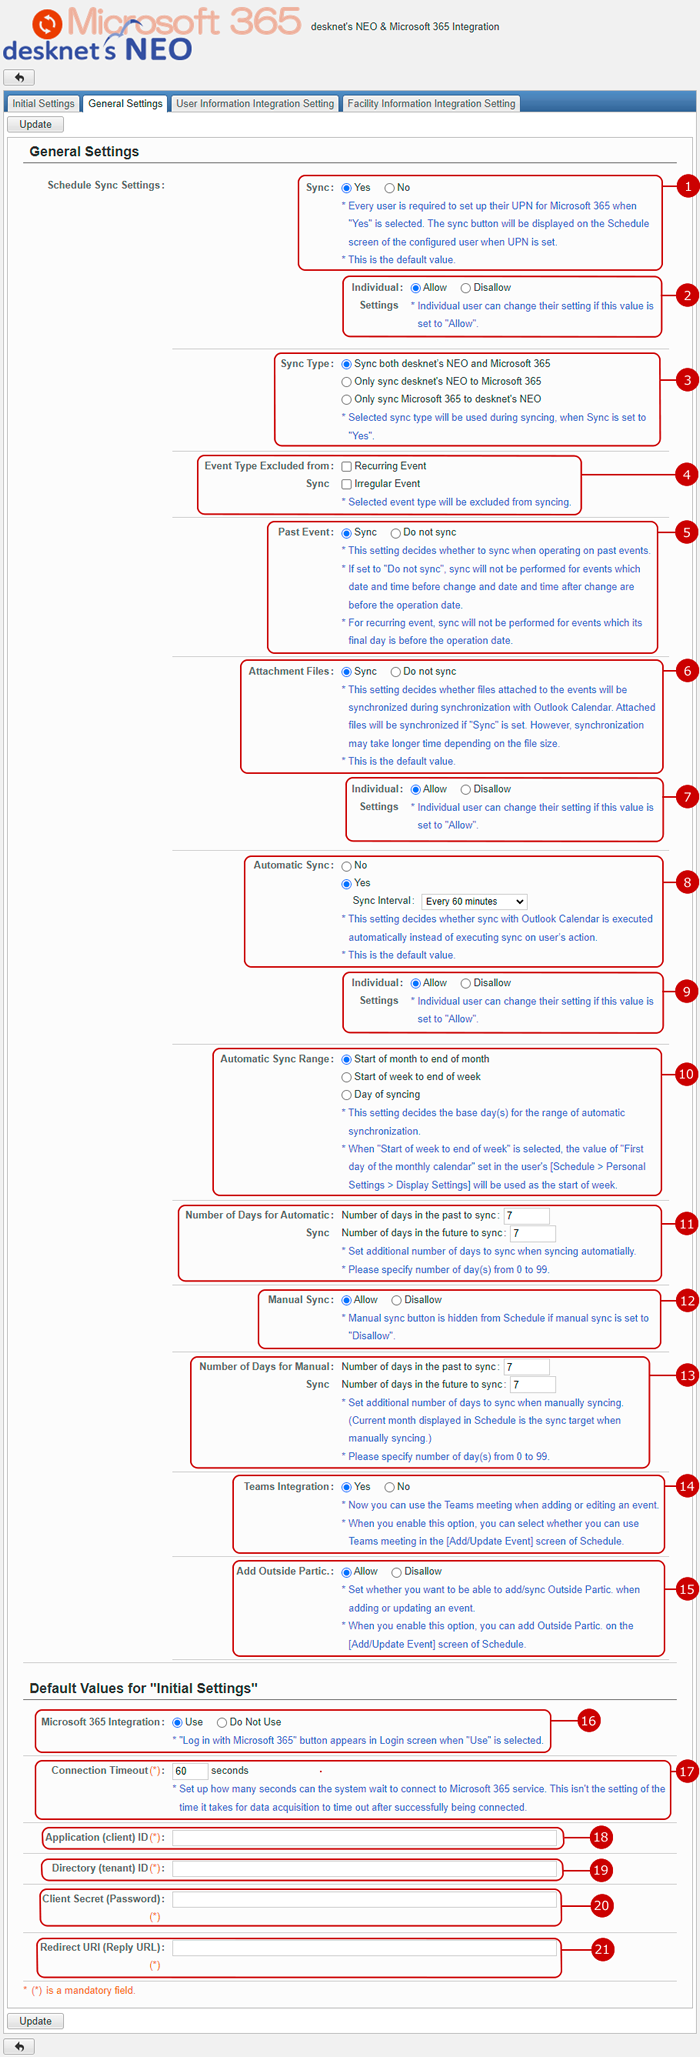
- Choose whether to synchronize calendar events or not.
Activates synchronization of desknet's NEO Schedule with Outlook Calendar.
If set to "Yes", [Sync with Outlook Calendar] button will be displayed on the schedule screen.
[Sync with Outlook Calendar] button is displayed only when "Sync" is set to "Yes" and, user's UPN and email address has already set in individual user setting.
* If "Manual Sync" is set to "Disallow", [Sync with Outlook Calendar] button will not appear on schedule screen.
- Choose whether each user can change their own "Sync" setting.
If set to "Allow", users can change their own settings.
- Configure the sync type.
This setting is to set the sync type when synchronizing desknet's NEO Schedule with Outlook Calendar.
- When "Sync both desknet's NEO and Microsoft 365" is chosen.
Performs a bidirectional sync of desknet's NEO Schedule to Outlook Calendar, and Outlook Calendar to desknet's NEO Schedule.
-
When "Only sync desknet's NEO to Microsoft 365" is chosen.
Performs a unidirectional sync of desknet's NEO Schedule to Outlook Calendar, and does not sync Outlook Calendar to desknet's NEO Schedule.
-
When "Only sync Microsoft 365 to desknet's NEO" is chosen.
Performs a unidirectional sync of Outlook Calendar to desknet's NEO Schedule, and does not sync desknet's NEO Schedule to Outlook Calendar.
- Configure the event type to be excluded from sync.
Configure the event type to exclude from synchronization.
- Configure whether to synchronize past events or not.
This setting chooses whether to sync events before the day of syncing.
- Configure whether to sync attachment files or not.
Set whether attachment file(s) will be synchronized along with Schedule.
Synchronizing attachment files may take longer time.
Please note that file data will be downloaded and will affect the server's hard disk capacity.Please take note.
- Choose whether each user can change their own "Attachment Files" setting.
If set to "Allow", users can change their own settings.
- Configure automatic sync.
Set whether to sync schedule data automatically and select the time interval for automatic sync.
Sync interval can be selected from "Every 10 minutes", "Every 15 minutes", "Every 30 minutes" or "Every 60 minutes".
- Choose whether each user can change their own "Automatic Sync" setting.
If set to "Allow", users can change their own settings.
- Configure automatic sync range.
Select the sync target range for automatic sync.
* When set to "Start of week to end of week", the synched user's "First day of the monthly calendar" setting value in [Schedule > Personal Settings > Display Settings] will be used as the start of the week.
- Configure additional number of days for automatic sync.
Enter the additional number of days in the past and number of days in the future to sync.
[Automatic Sync Range] is treated as automatic sync base range, and number of days inserted is additional range number of days to be included in automatic sync.
- Choose whether to allow manual synchronization.
If set to "Allow", sync button will be displayed on the schedule screen.
- Configure additional number of days for manual sync.
Enter the additional number of days in the past and number of days in the future to sync.
Current month displayed in Schedule when manually syncing is the manual sync base range, and number of days inserted is additional range number of days to be included in manual sync.
- Set whether to use Teams Integration or not.
When you select "Yes", you can select use Teams meeting when adding or editing an event.
- Set whether to allow add outside participants.
If set to "Allow", you will be able to add outside participants when adding or editing an event.
- Set whether to use Microsoft 365 Integration in desknet's NEO : Same value as the one in Initial Setting.
Set whether to use Microsoft 365 Integration across entire desknet's NEO.
When "Do Not Use" is selected, [Log in with Microsoft 365] button does not appear in the desknet's NEO login screen.
- Configure connection timeout in seconds when connecting to Microsoft 365 service.
Set how many seconds to wait while trying to connect to Microsoft 365.
- "Application (client) ID" : Same value as the one in Initial Settings.
- "Directory (tenant) ID" : Same value as the one in Initial Settings.
- "Client secret (Password)" : Same value as the one in Initial Settings.
- "Redirect URI (Reply URL)" : Same value as the one in Initial Settings.
Click "Update" button to save the changes.
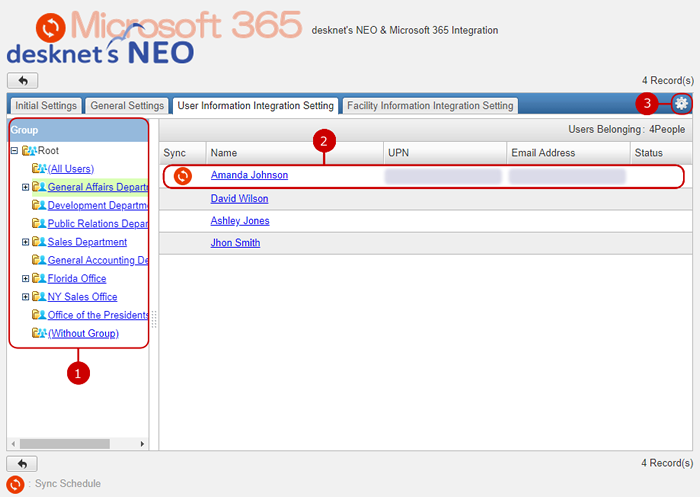
User Information Integration Setting
Click on the tab User Information Integration Setting to configure individual users.
A user who has been assigned as the application administrator can use application administration functions.
-
Select a group.
The group tree will appear.
Choose the group which the user you want to change the settings of belongs to.
-
Target users are displayed.
Click on the user name to display the UPN settings screen.
-
Clicking the gear button on the right top shows you the whole menu of the user information integration settings.
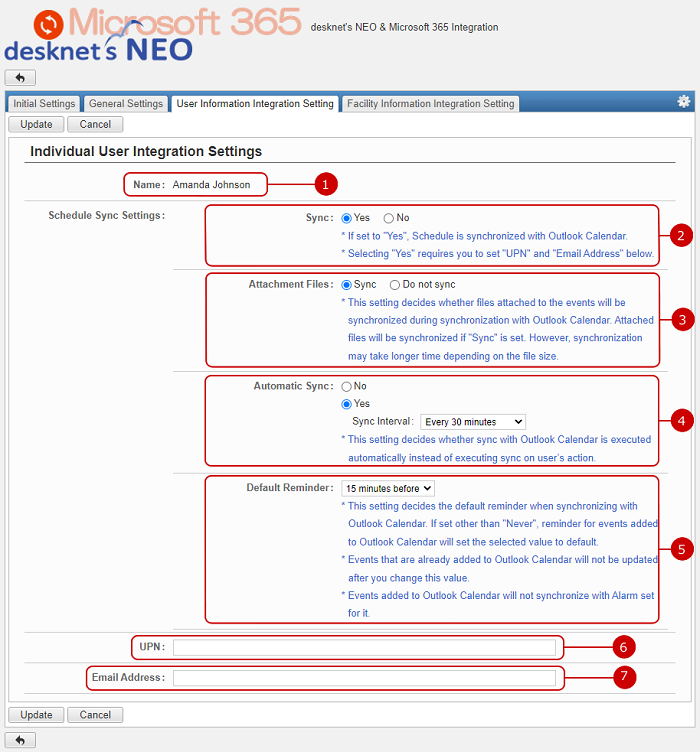
- The name of the target user is displayed.
- Choose whether to synchronize calendar events or not.
Activates synchronization of desknet's NEO Schedule with Outlook Calendar.If set to "Yes", [Sync with Outlook Calendar] button will be displayed on the schedule screen.
Sync button is displayed only when "Sync" is set to "Yes" and, user's UPN and email address has already set in individual user setting.
* If "Manual Sync" is set to "Disallow", [Sync with Outlook Calendar] button will not appear on schedule screen.
- Configure whether to sync attachment files or not.
Set whether attachment file(s) will be synchronized along with Schedule.
Synchronizing attachment files may take longer time.
Please note that file data will be downloaded and will affect the server's hard disk capacity.Please take note.
- Configure automatic sync.
Set whether to sync schedule data automatically and select the time interval for automatic sync.
Sync interval can be selected from "Every 10 minutes", "Every 15 minutes", "Every 30 minutes" or "Every 60 minutes".
* Automatic synchronization will start when set to "Yes".
* Once you turned on automatic sync, automatic synchronization will continue until you set it to "No".
- Configure default reminder.
Choose whether to set reminder for Outlook Calendar, and uses the selected value for the default reminder.
- Configure UPN (User Principal Name).
A user identifier for Microsoft 365. Please check the details of the Microsoft 365 account.
- Configure email address.
Set the email address of the Microsoft 365 account.
Click "Update" button to save the changes.
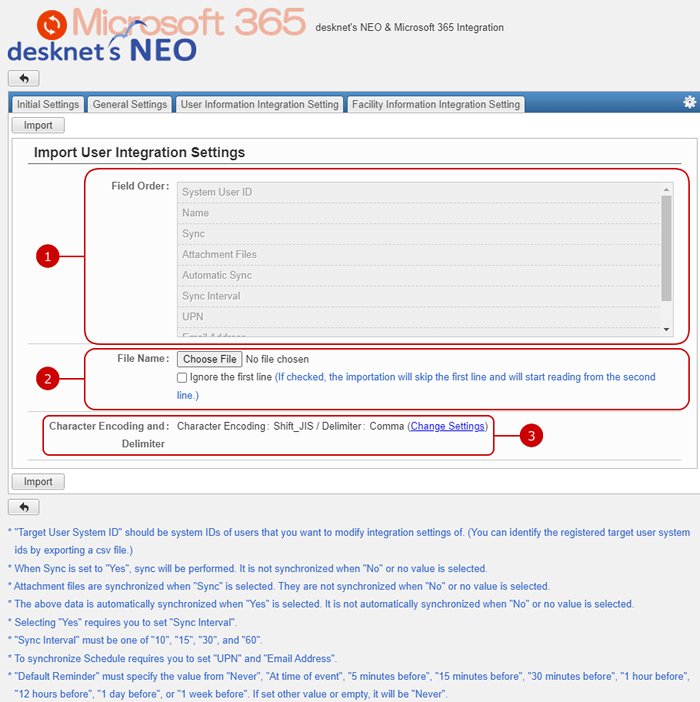
To Add User Information Integration Settings from File (Import)
Click Import User Integration Settings link to open Import User Integration Settings screen.
You can add user information integration settings from a file in one batch.
-
The fields of user information integration settings are displayed.
-
Choose a file. If you would like to ignore the first line, select the check box.
-
Choose a character encoding and delimiter of the file.
Press Change Settings link to change the character encoding and delimiter options.

-
Choose a character encoding.
-
Choose a delimiter.
Click Import to start to import user information integration settings, after you fill in the all fields you need.
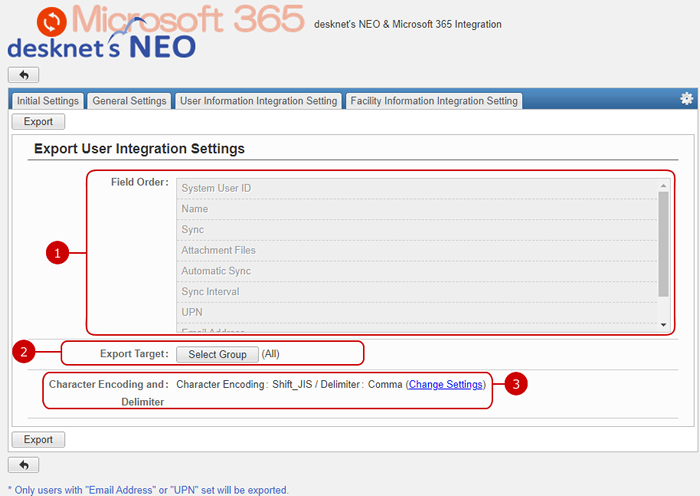
To Save User Information Integration Settings to File (Export)
Click Export User Integration Settings to open Export User Integration Settings screen.
You can save the current user information integration settings to a file.
-
The fields of user information integration settings to be saved are displayed.
-
Users who belong to the group you selected are saved.
When you press "Select Group" button, Group Selection window is displayed.
-
Select a character encoding and a delimiter.
Press Change Settings link to change the character encoding and delimiter options.

-
Choose a character encoding.
-
Choose a delimiter.
Click Export to start to export user information integration settings, after you fill in the all fields you need.
* Only users with "Email Address" or "UPN" value set will be exported.
Facility Information Integration Setting
Click the tab Facility Information Integration Setting to configure integration settings of facilities.
The users who are assigned to the application administrator can use the application management functions.
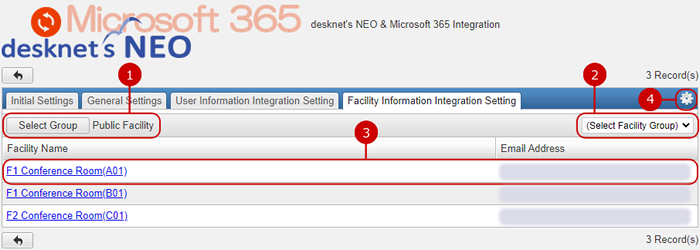
- Choose the administrative group for the target facility.
-
Choose the facility group.
- Facilities of the selected administrative group (1) and the selected facility group (2) are displayed.
If you click on the facility name, the email address setting screen of the facility is displayed.
-
Clicking the gear button on the right top shows you the whole menu of the facility information integration settings.
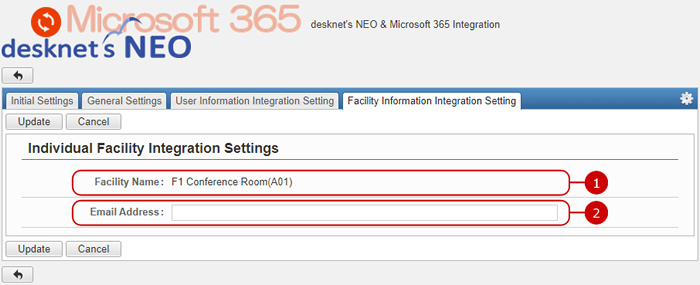
- The name of the target facility will appear.
- Email Address
Set the email address of the Microsoft 365 conference room.
Click "Update" button to save the changes.
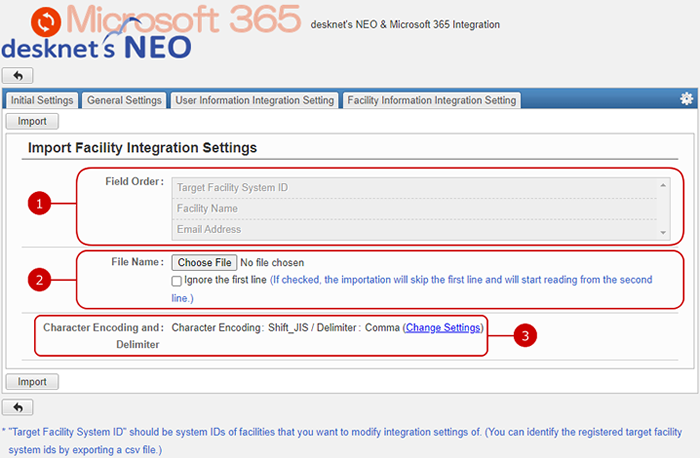
To Add Facility Information Integration Settings from File (Import)
Click "Import Facility Integration Settings" to open "Import Facility Integration Settings" screen.
You can add facility information integration settings from a file in one batch.
-
The fields of facility information integration settings are displayed.
-
Choose a file. If you would like to ignore the first line, select the check box.
-
Choose a character encoding and delimiter of the file.
Press Change Settings link to change the character encoding and delimiter options.

-
Choose a character encoding.
-
Choose a delimiter.
Click Import to start to import facility information integration settings, after you fill in the all fields you need.
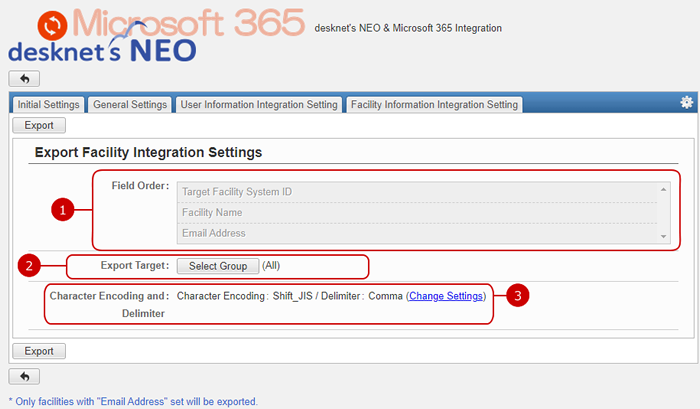
To Save Facility Information Integration Settings to File (Export)
Click "Export Facility Integration Settings" to open "Export Facility Integration Settings" screen.
You can save the current facility information integration settings to a file.
-
The fields of facility information integration settings to be saved are displayed.
-
Users who belong to the group you selected are saved.
When you press "Select Group" button, Group Selection window is displayed.
-
Select a character encoding and a delimiter.
Press Change Settings link to change the character encoding and delimiter options.

-
Choose a character encoding.
-
Choose a delimiter.
Click Export to start to export facility information integration settings, after you fill in the all fields you need.
* Only facilities with "Email Address" value set will be exported.
